

Having just bought the new Razer Lycosa keyboard, I unfortunately ran into the same problems as many others did. For me the shift and backspace-keys only worked occasionally and the backlight was considerably darker in the center of the keyboard. Placing a coin on the Razer-mediakey seemed to help, but now I was unable to use any other media buttons, or the Windows-key, and one of the reasons I bought this particular keyboard (besides its awesome feeling :D) were the mediakeys.
With the store having closed and me not wanting to return it, I read from someone who claimed that he just opened his keyboard und tinkered a bit with the plugs inside, which fixed his Lycosa. So I gave it a try – and it worked! I’ve taken some photos while working and will try to recount every step I made, so you can fix your keyboard too. The actual problem seems to be a screw that prevents the touchpad-plug to fully connect to the main chip board, which screws up some major functions like sending input „signals“ longer than a few milliseconds.

Update [11. July]: It seems like Razor finally realized, that many of their keyboards have this problem and offer replacements now. To quote one of the comment authors:
There is no need to ship our Lycosas back: it looks like the Razer team is replacing every keyboard just after veryfing yours is one of the ~not properly working~ Lycosas. I just got their answer:
“We have verified that your Lycosa is one of the units affected by the known issues. We apologize for the trouble you have had with the Razer Lycosa and the inconvenience this has caused you. We have made arrangements for a new Lycosa to be sent to your address. ”
Good for us!
Disclaimer: This fix does not guarantee anything, your keyboard might return to the bugged state after a few days. The cause of all the malfunctions is a plug inside the keyboard that might lose it’s connection, because of how the whole Lycosa is built. You can come up with your own ideas, for example solder every pin to the main circuit-board, or try my solution. Fortunately, you don’t have to break any warranty seals / stickers when opening the case. So you could give it a try and if it still does not work, you can return it to the store.
Step 1

Unplug your keyboard, turn it around and remove all 19 screws. Seems like Razer build their keyboards to resist even a nuclear strike. 😉 Once you have removed all the marked screws, pull off the palm rest and put it aside.
Step 2
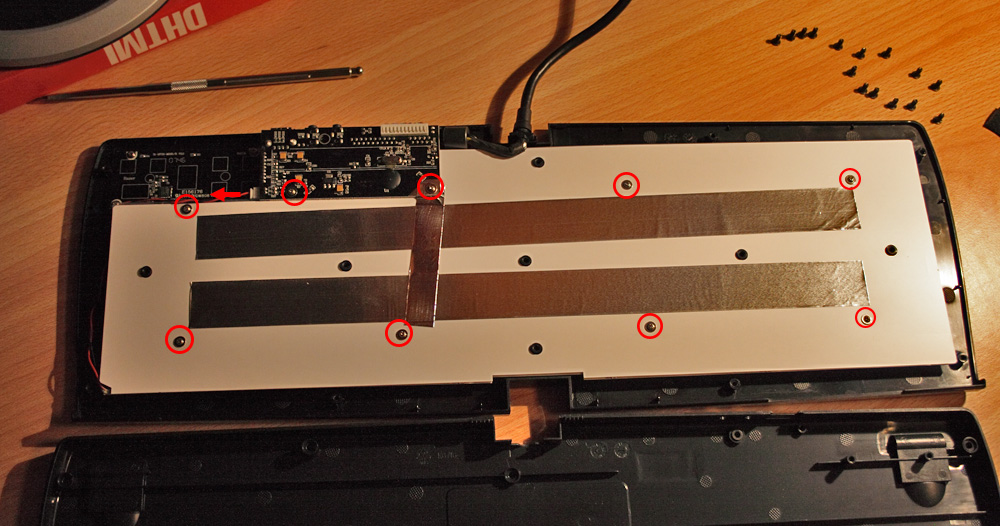
Carefully remove the backplate of your keyboard and put it aside. Now unscrew and remove the next 9 screws which are marked in the photo. After that, unplug the LED power connector (red arrow). Try not to mix those second screws with the ones from step 1, as they are different.
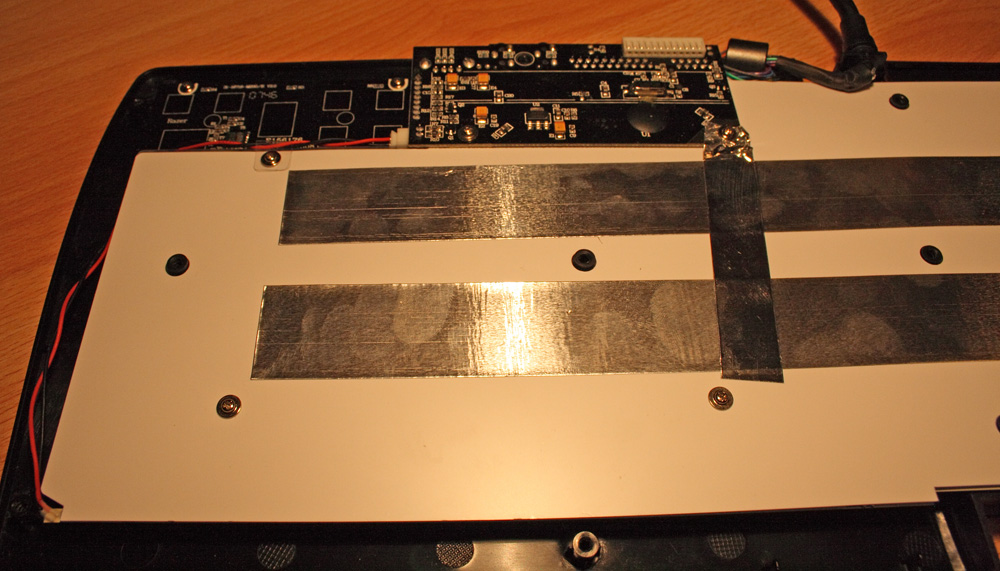
Step 3
Peel away the silvery tape from the main circuit board. Don’t worry if it rips, as long as you can still connect it to the board. After that, remove the white backpane.
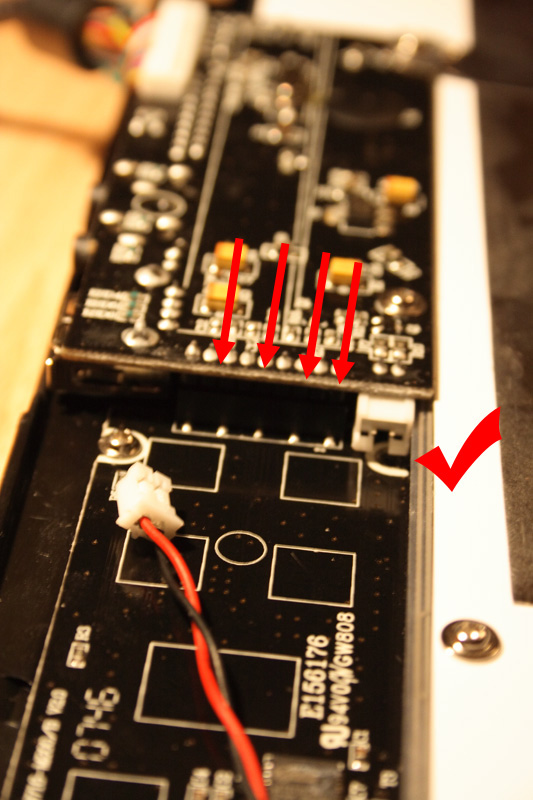
Step 4
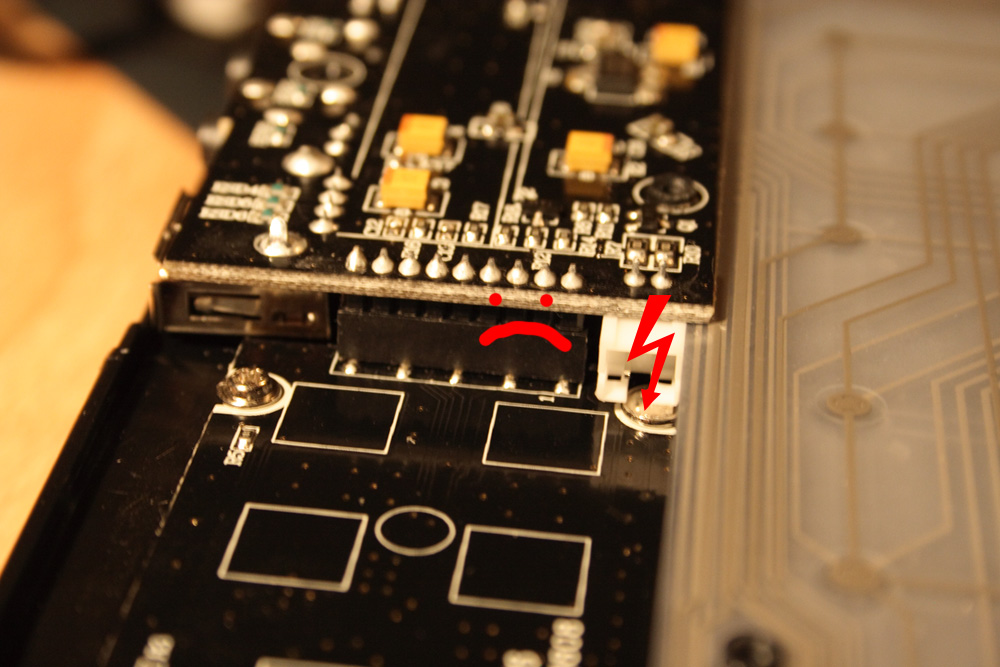
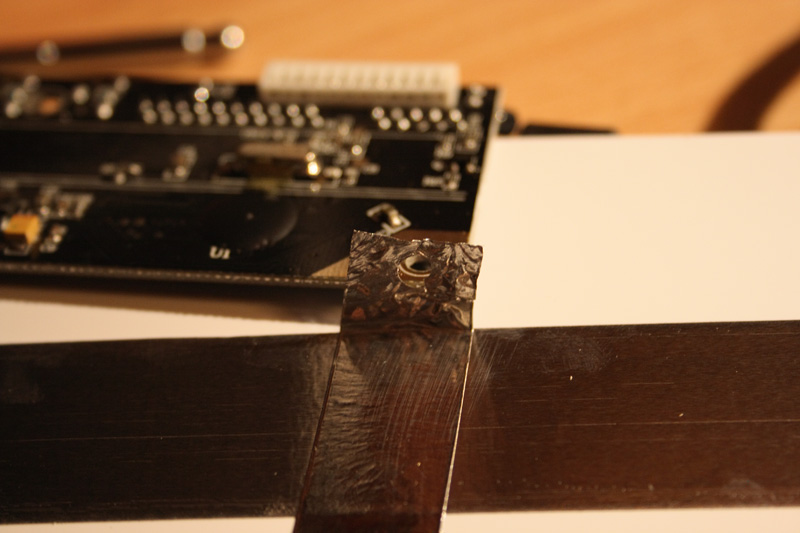
Now we can take a look at the mischievous screw… It blocks the whole circuit board from being pushed down and the touchpad plug from connecting fully. The screw itself is just fine, but unfortunately the plug at the left can lose the connection because of it!
Step 5
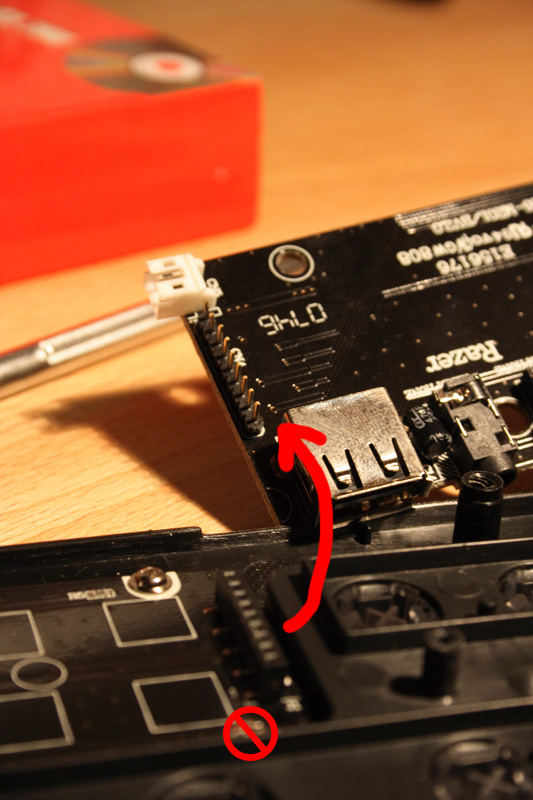
Here comes the critical part: carefully unplug the upper circuit board and remove the evil screw of doom. As it’s one of 4 supporting screws of a touchpad (and not a hammerpad) it won’t be missed.
Step 6
Now put the white backpane back onto the keyboard and tightly connect the upper circuit board to the touchpad. At that point, the key problems should be gone. To make sure that everything works, plug in your keyboard and power up your computer. Make sure that everything now works like it should, before you move on to the next step. If it still bugs, you didn’t connect it thoroughly.
Step 7 (optional)

If your back-lit keys were too dark around the center of the keyboard, turn around the whole inside and check the board for any dark spots. If you don’t find any (like in the photo), the darker keys in the center are probably a result of too tight screws.
Step 8
Put everything together. Don’t forget the silver tape, you have to reconnect it to the edge of the circuit board. Before you close the chassis, once again make sure everything works fine. After that, add the screws in groups of 3 or 4, constantly rechecking the functionality of your keyboard. I had to screw them in twice, because after the first time they backlight became darker if I closed the chassis.
If you did everything right, your keyboard should be fully operational, all the keys working. You should even be able to press Ctrl + V with capslock on. 😉 I hope my little guide helped you fix this otherwise great keyboard. If you have any questions, use the comment function under this post!
